Building Serverless Contact Form For Static Websites
Introduction
A few years ago AWS launched static hosting service S3, which was a paradigm shift for hosting static websites. The tech was crystal clear, all the static assets (HTML, CSS, and JS) would reside in an S3 bucket to host your impressive website. A pretty cool idea I personally liked it, really. Had it not been for that super important contact form hosting on S3 would have been cool but your contact form would be a joke unless you had another server in place to service AJAX requests from that form. The moment you had that service ready, the S3 solution wouldn’t appear so attractive at all.
In the age of cutting edge technology, there’s always jaw-dropping innovations around the corner. One of the awesome tech innovation happens to be serverless. Not that there are no servers involved but you can care less about them now. Serverless can be a proper and viable solution to a lot of problems, it is the most perfect solution for your static hosted contact form. Keep reading by the end of this post you will be able to handle your website forms in the most inexpensive and simplest manner possible.
The Serverless Framework
 Source: https://serverless.com/
Serverless is your toolkit for deploying and operating serverless architectures. Focus on your application, not your infrastructure. — Serverless.com
The Swiss army knife of Serverless technologies. Serverless Framework is a free and open-source web framework written in Node.js. Serverless was the first framework to be developed for building applications exclusively on AWS Lambda, the serverless computing platform provided by Amazon Web Services. Currently, applications developed with Serverless Framework can be deployed to other FaaS service providers. Here is the list of the Serverless cloud services supported by the Serverless Framework:
- AWS Lambda
- Google Cloud Functions
- Azure Functions
- IBM OpenWhisk
- Alibaba Function Compute
- Iron Functions
- Auth0 Webtask
- Oracle Fn Project
- Spotinst
- Kubeless
Getting started with Serverless Framework
Obviously, you are pretty excited to get started with the Serverless Framework, let’s cut to the chase and start by installing Serverless.
Setting up Serverless is simple. You need to install it through npm and link it to your AWS account.
1. Installing Serverless Globally
Time to get hands-on Serverless stuff.
$ npm install serverless -gThis command installs Serverless globally on your local machine. The Serverless commands are now available to you from your terminal.
Note: Running Linux, you may want to run the above command as sudo.
2. Create an IAM user in the AWS Console
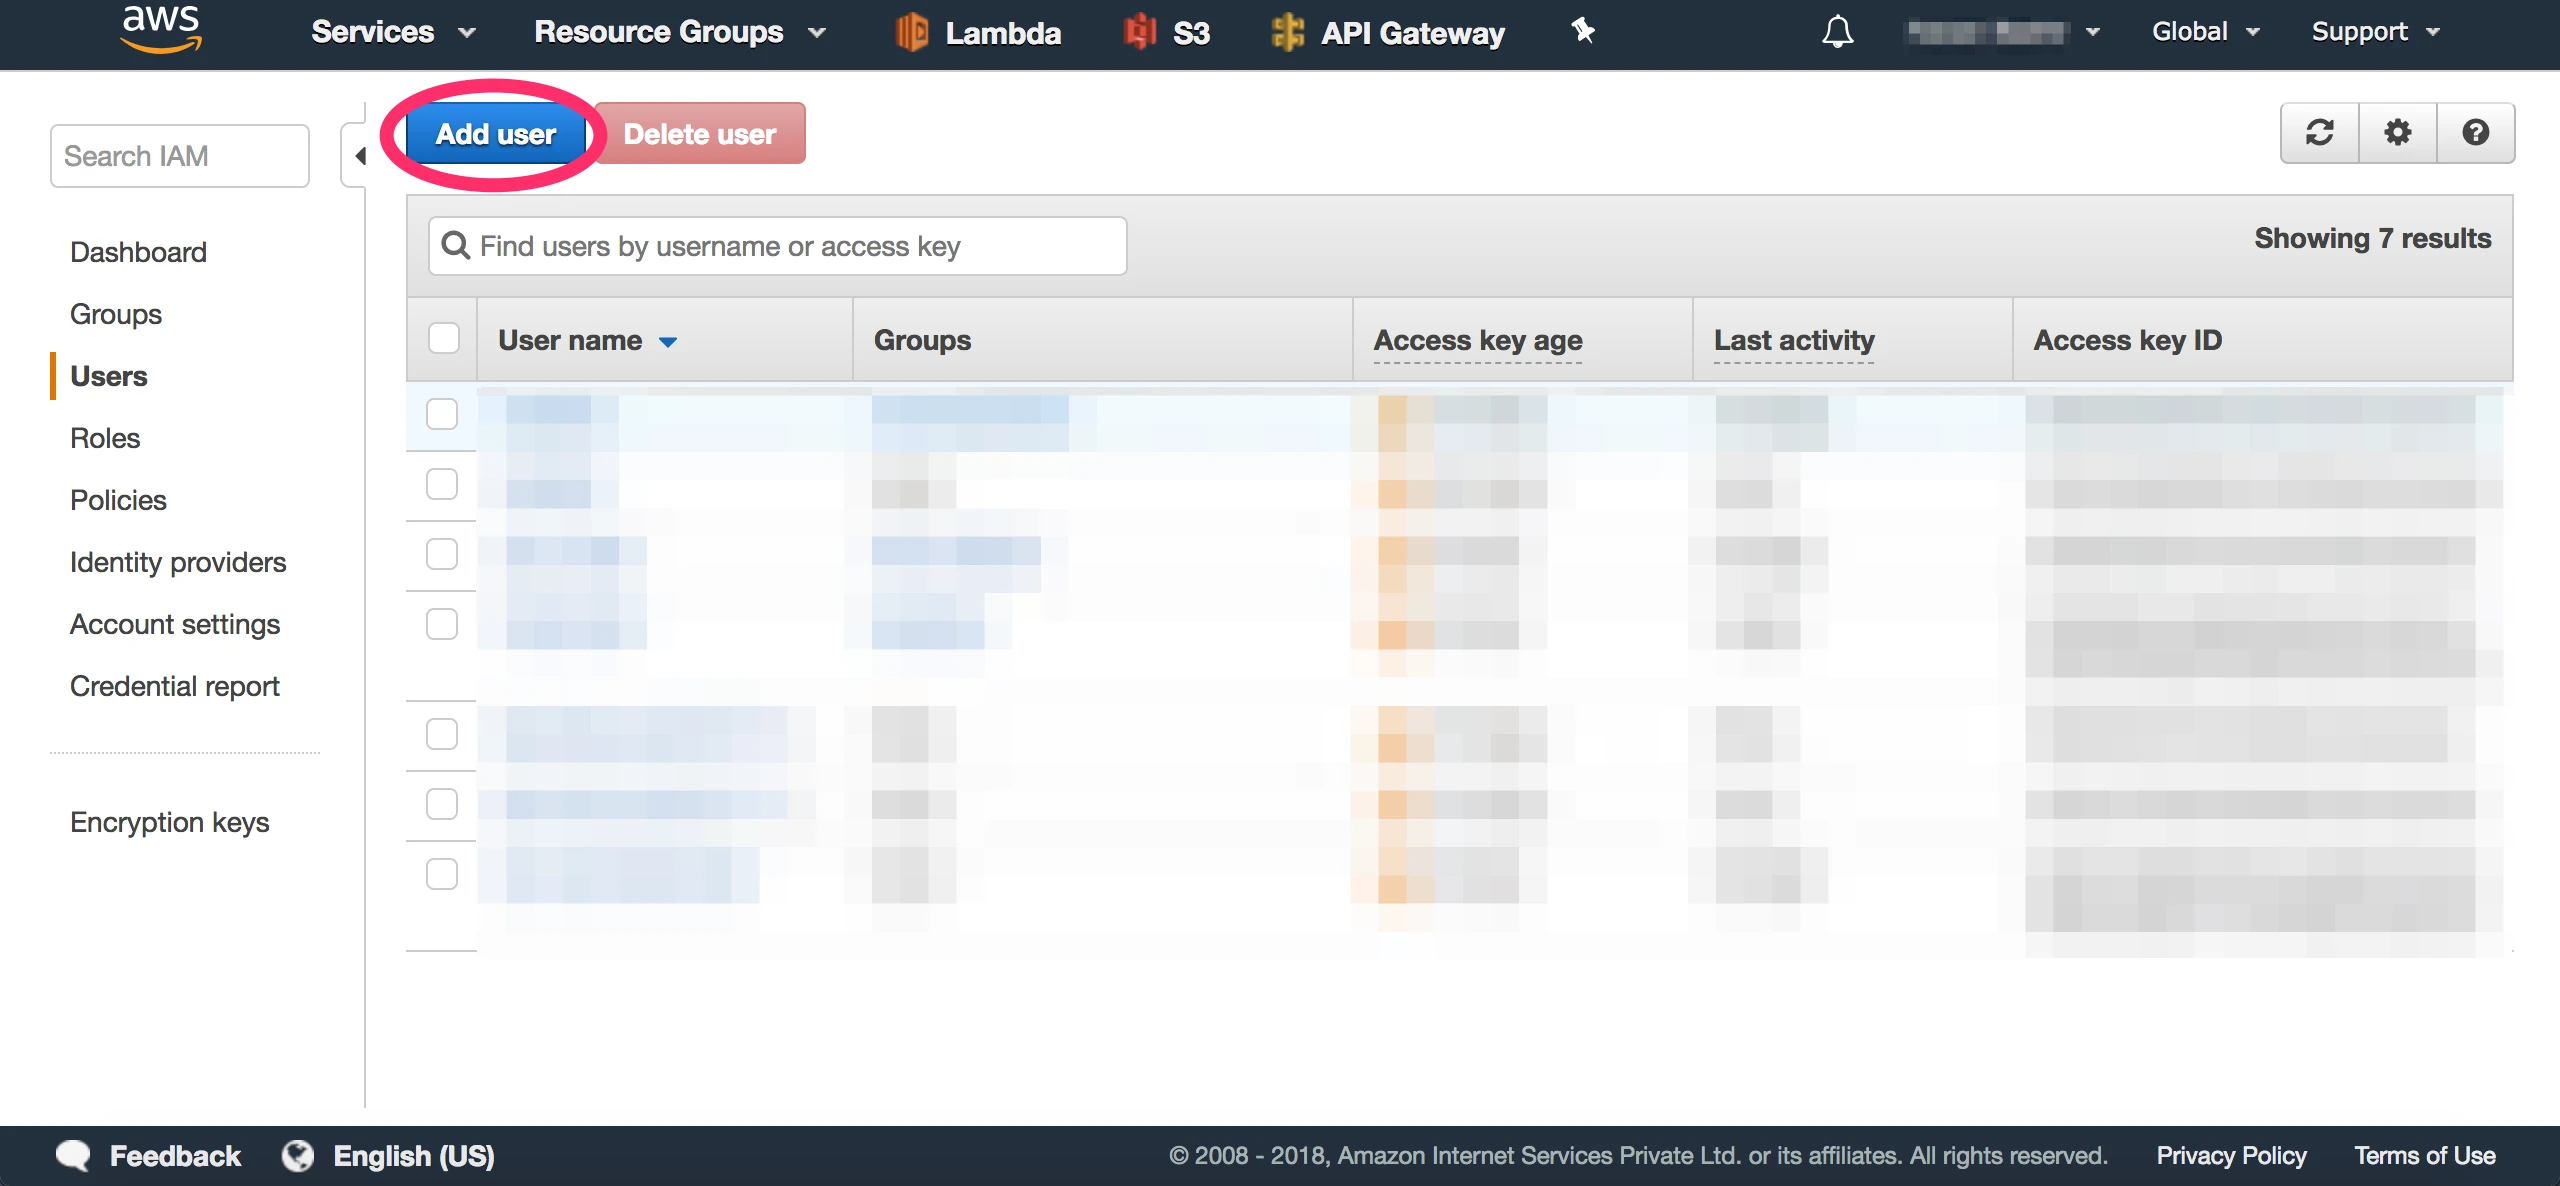
Go to your AWS Console, you will find the IAM service listed below the “Security, Identity & Compliance” group. Inside the IAM dashboard click on the Users tab and click “Add User” button.
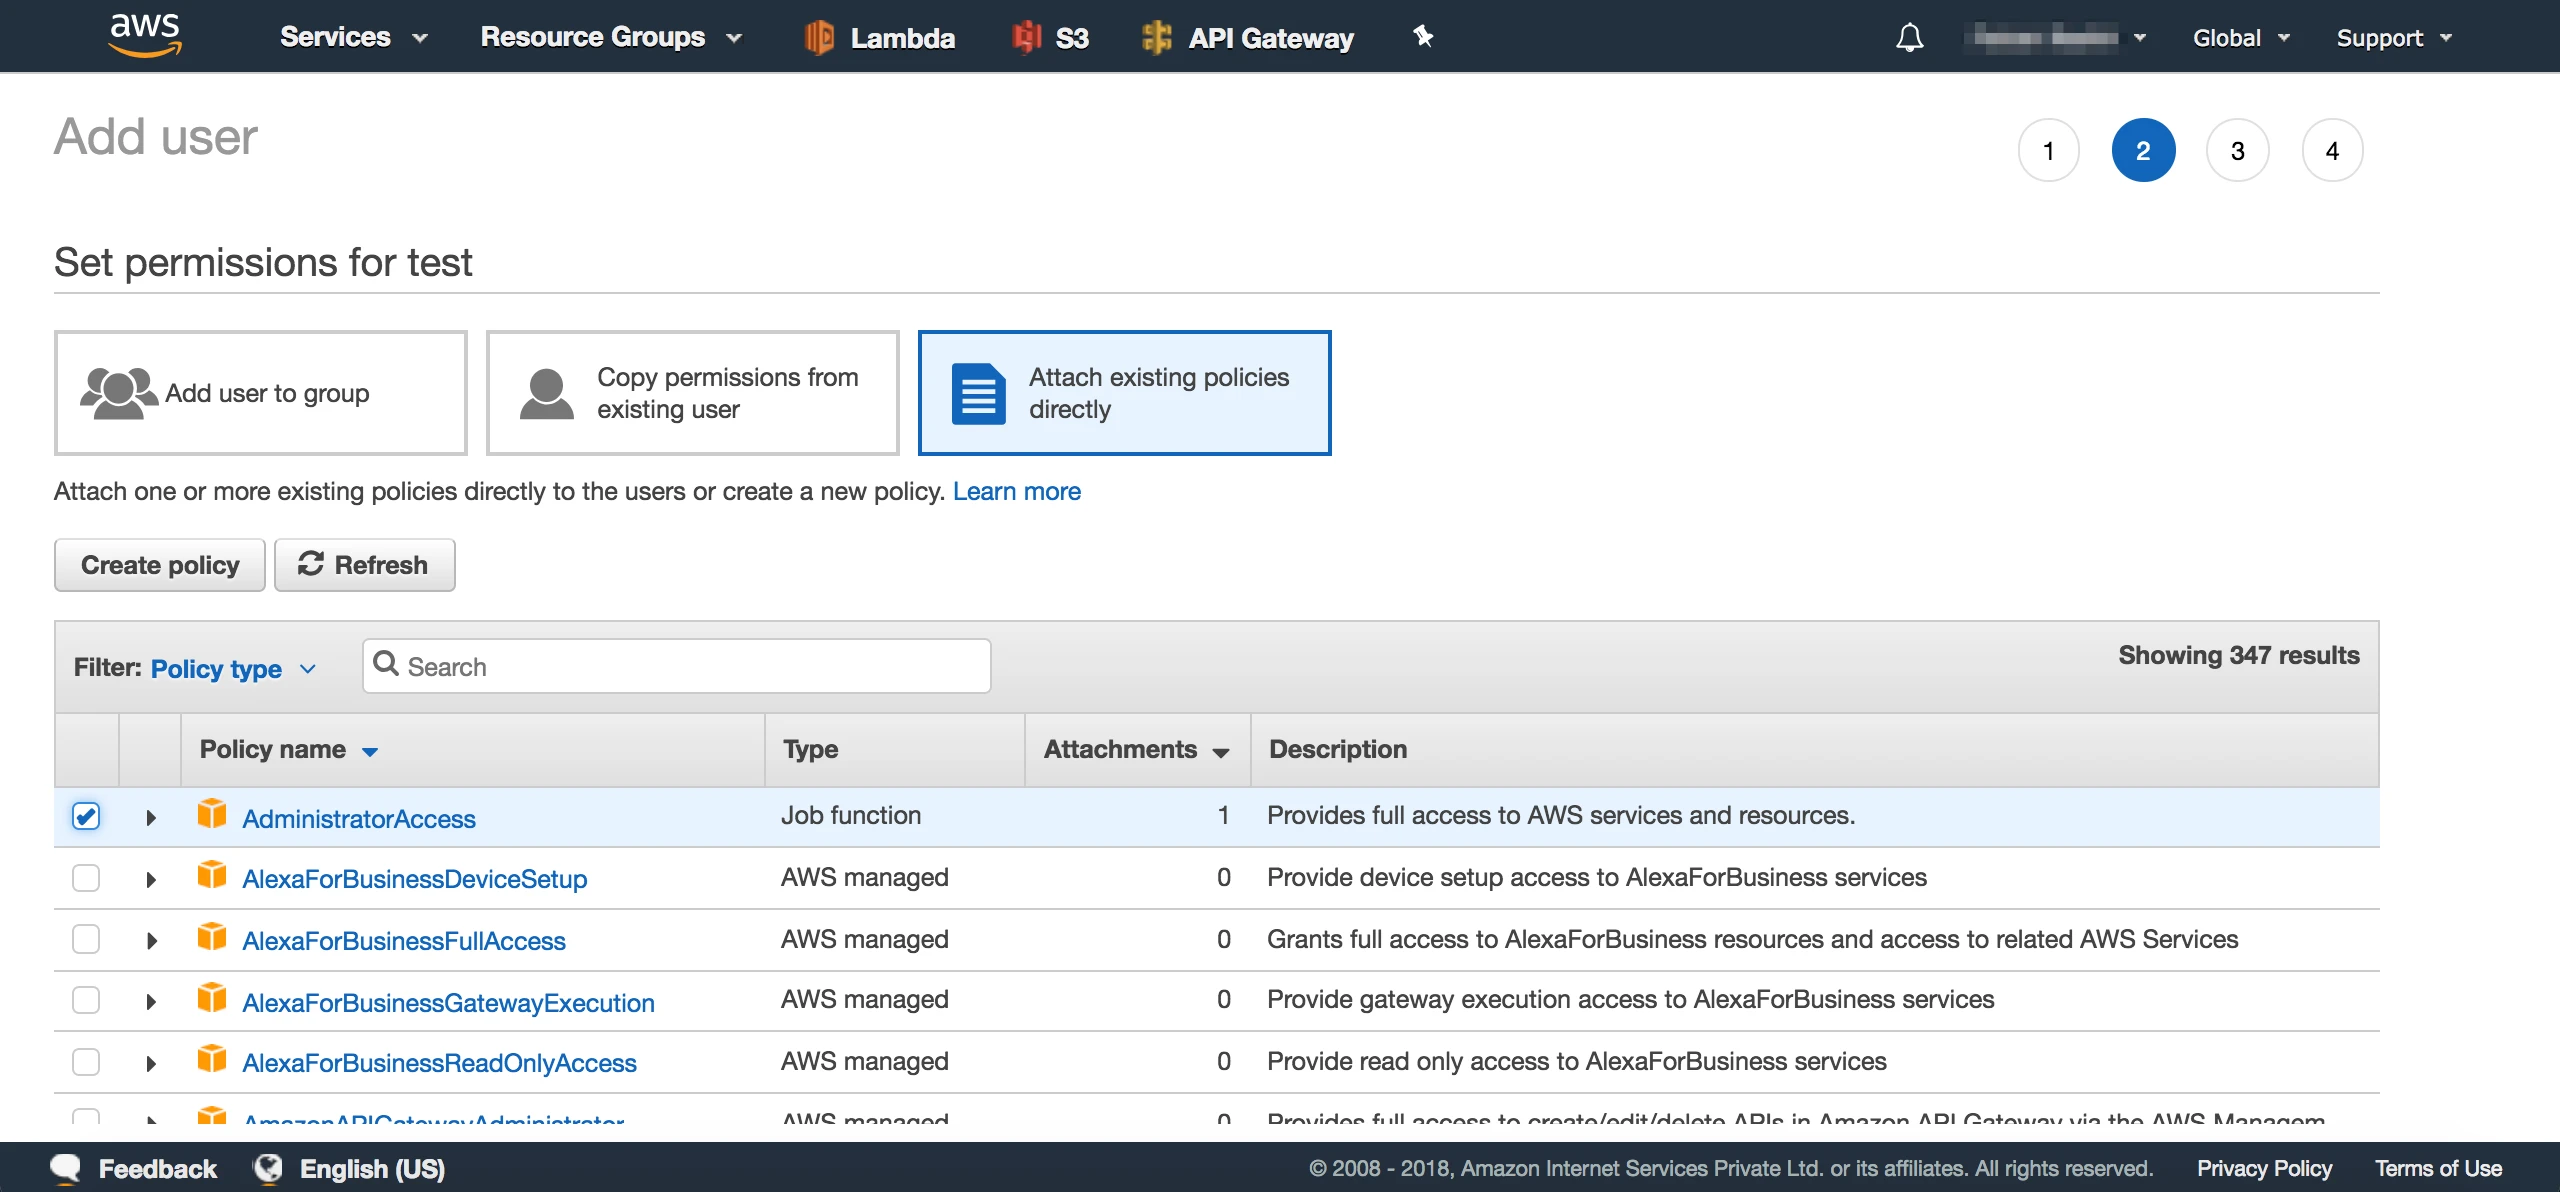
Create a new user and allow the user programmatic access by clicking on the Programmatic access checkbox. Next, in the permissions section, you need to add a set of permissions to the user. From the list of available options under the “Attach existing policies directly” check the AdministratorAccess.
After the user is created, you will have access to the users Access Key ID and Secret Access Key. You will be required to use these keys in the next step.
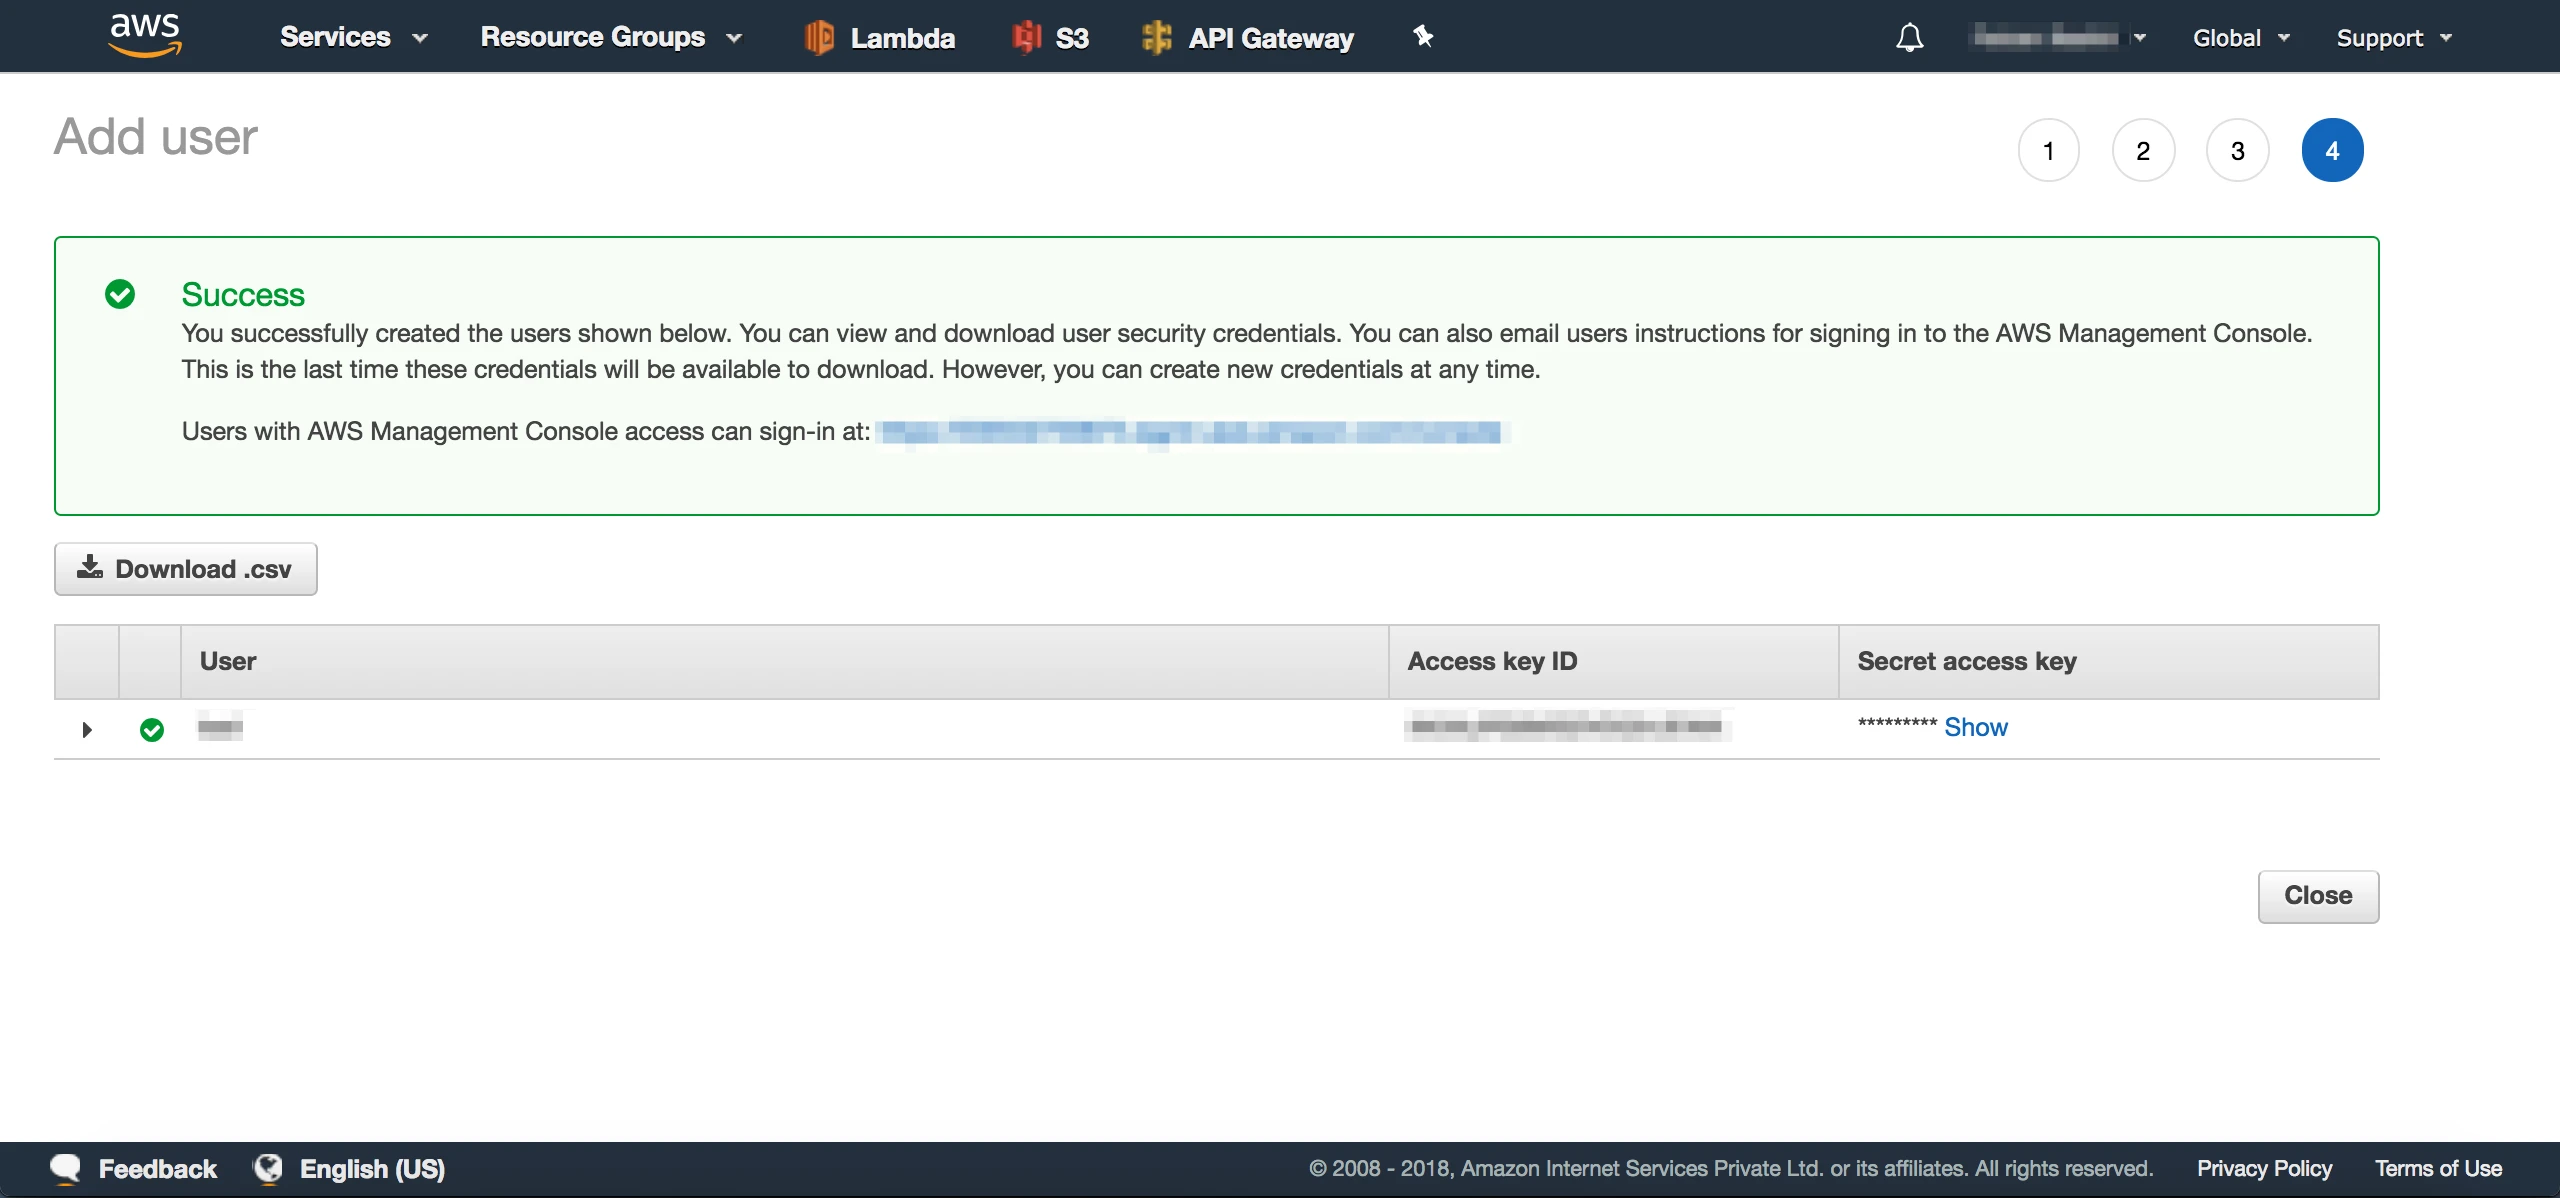
Word of Caution: These are the kind of credentials you don’t want to lose even by mistake, remember you have provided AdministratorAccess to this user. The user with AdministratorAccess can do pretty much everything with your AWS account.
3. Configuring Serverless to use IAM Credentials
Great! With the keys, you can set up Serverless Framework to access your AWS account. Switch to your terminal and use this command to configure Serverless:
$ sls config credentials --provider aws --key xxxxxxxxxxxxxx --secret xxxxxxxxxxxxxx --profile <username>Now your Serverless installation knows what account AWS to connect.
Note: sls is an alias for the serverless command. You can use both to the same effect. But sls is kinda cool.
4. Creating a service
With the Serverless Framework hooked up with your AWS account, you can set up a Serverless project in a jiffy. Fire up the terminal and issue the following command:
$ sls create --template aws-python --path <your-folder-path>The --template flag is used to specify a preset template with the given settings. In the above command the template aws-python will set up the project configured to use AWS as the provider and Python as the runtime. The command will auto-generate serverless.yml , handler.py and .gitignore file with preset values.
The configuration is defined in the serverless.yml file. This file is the most important file in the Serverless Framework. It’s almost magical, given how it can spin up the infrastructure you have defined in it. The contents of the auto-generated serverless.yml file will look something like this:
service: <your-service-name>
provider:
  name: aws
  runtime: python2.7
functions:
  hello:
    handler: handler.hello
The provider section defines everything related to the service provider, there are a lot more properties to configure it further you can take a look at them here. In the auto-generated serverless.yml file, you need to add two important tags under the provider section, which are as follows:
region: <your-aws-region>
profile: <aws-username-with-programmatic-access>
The functions property is used to declare the serverless functions, you can declare multiple functions under this property. The above example declares a function called hello present in the handler.py file. Browse over to the handler.py file and you will find something like this:
import json
def hello(event, context):
    body = {
        "message": "Go Serverless v1.0! Your function executed      successfully!",
        "input": event
    }
    response = {
        "statusCode": 200,
        "body": json.dumps(body)
    }
    return response
The Serverless App
Our Serverless solution makes use of AWS infrastructure, it consists of API Gateway, Lambda Functions, DynamoDB and Simple Email Service(SES). To achieve this end result we will use the previously introduced Serverless Framework.
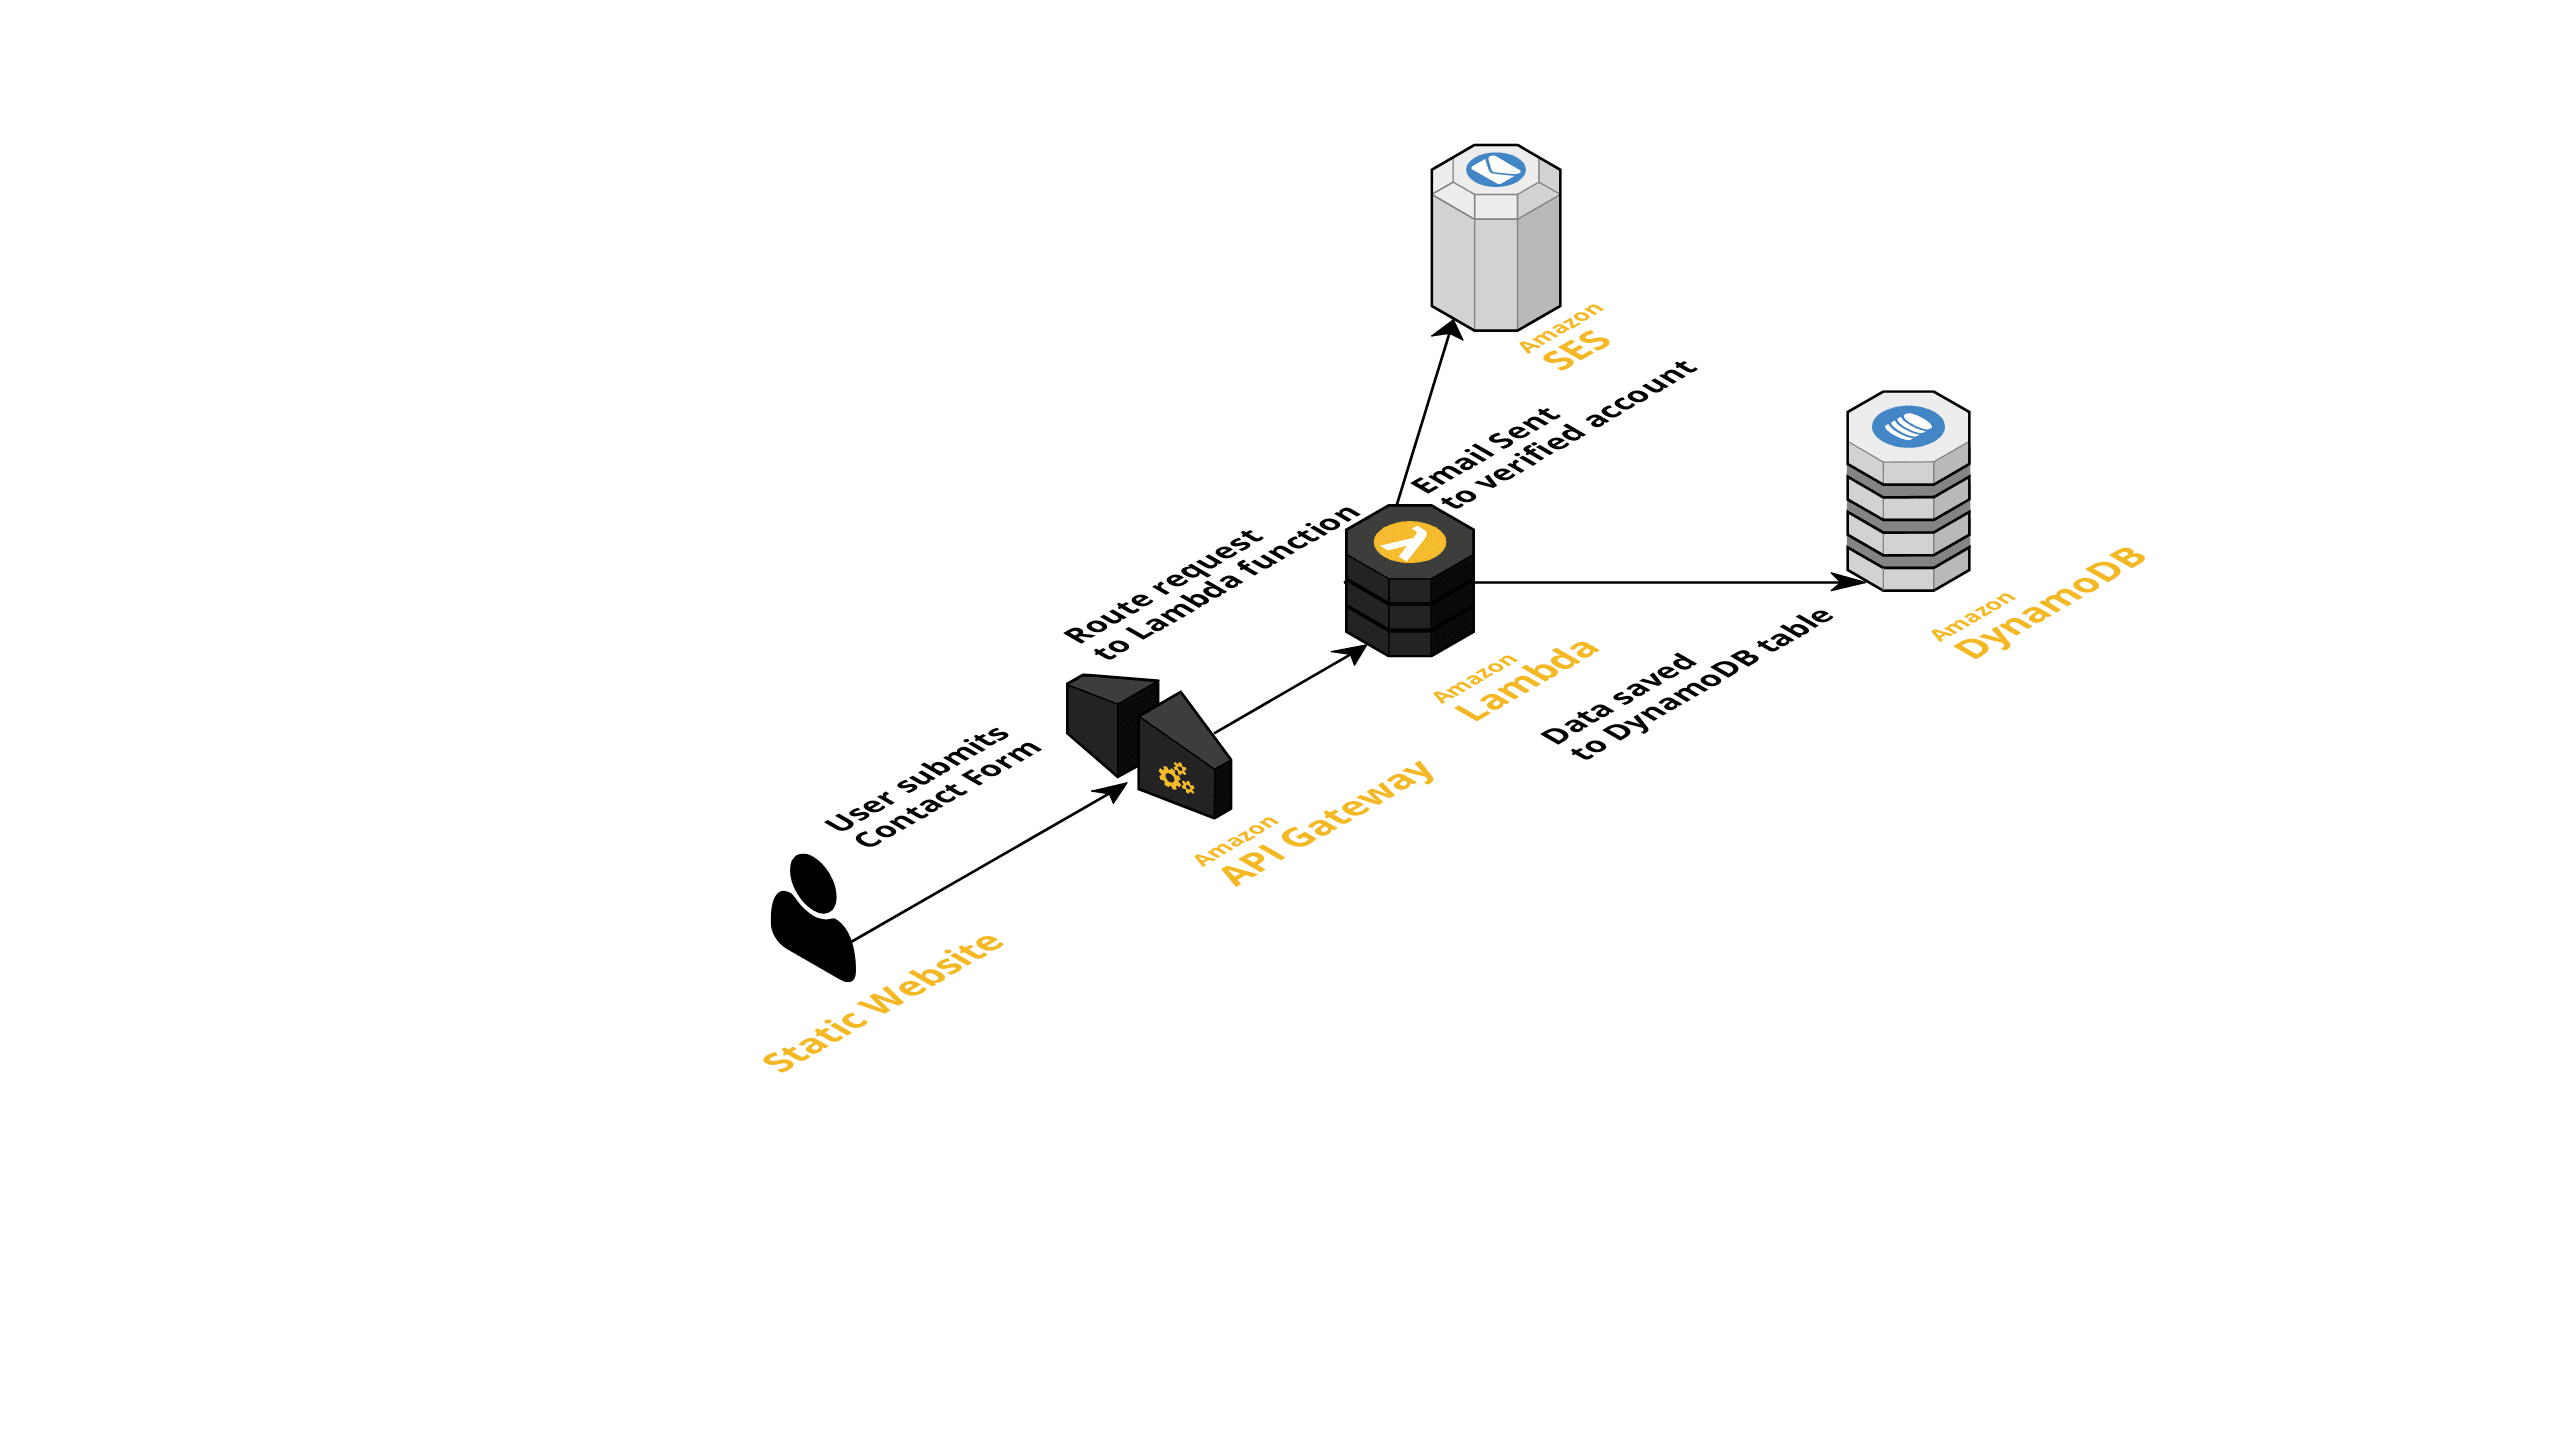
- Static Website — Amazon S3 provides a robust and simple web server. All of the static HTML, CSS and JS files for your application can be served from S3. The contact form on our static website is submitted using AJAX.
- API Gateway — The API Gateway is the event source for the application, it acts as a bridge between our contact form and serverless lambda function. It routes the request from the contact form to the lambda function. The API Gateway also performs tasks such as access control, monitoring, API version control and traffic management.
- AWS Lambda — AWS Lambda is the place where the action takes place. Lambda functions run in stateless compute containers that are event-triggered, managed and ephemeral. In our example, we use a lambda function to send email using SES and store the request contents in DynamoDB NoSQL database.
- Simple Email Service (SES) — The cloud-based email sending service from Amazon. Scalable email service, you can send marketing and transactional emails using SES. In our example, we use SES to send emails using a verified email address.
- DynamoDB — DynamoDB provides a scalable, consistent, fully managed and non-relational database from Amazon. In our example, we use DynamoDB to store and retrieve the messages received from the static contact form.
You can find the source code for the demo application here. Go ahead and clone it!
faizanbashir/python-ses-dynamodb-contactform
Application Walkthrough
Let’s have a stroll through the demo application before we actually deploy it on AWS.
1. Demystifying the serverless.yml file
The serverless.yml file defines the services the application needs to use and interact with. The resources and the actions the Serverless functions can perform are listed under the iamRoleStatements property. It lists the actions and resources.
iamRoleStatements:
  - Effect: "Allow"
    Action:
      - ses:SendEmail
      - ses:SendRawEmail
    Resource: "*"
  - Effect: "Allow"
    Action:
      - dynamodb:Scan
      - dynamodb:PutItem
    Resource: "arn:aws:dynamodb:${opt:region, self:provider.region}:*:table/${self:provider.environment.DYNAMODB_TABLE}"
In the serverless.yml we are allowing the Serverless functions to use ses:SendEmail and dynamoDB:PutItem actions among many others defined above.
Since Lambda runs serverless functions in the cloud, we need to define the functions somewhere. Functions are defined using the functions property. In our example application we have defined events attached to them.
functions:
  sendMail:
    handler: handler.sendMail
    description: Send Email using AWS SES Service
    events:
      - http:
          path: sendMail
          method: post
          integration: lambda
          cors: true
          response:
            headers:
              "Access-Control-Allow_Origin": "'*'"
  list:
    handler: handler.list
    description: List all the contact form submissions
    events:
      - http:
          path: list
          method: get
          integration: lambda
          cors: true
          response:
            headers:
              "Access-Control-Allow_Origin": "'*'"
Another great feature of Serverless Framework is that it will create an API in the AWS API Gateway and link it with relevant Lambda function. This is done using the http property defined in the events property.
2. Creating Resources
With Serverless Framework you create resources like a DynamoDB table as we have done here. This snippet of code is responsible for creating a DynamoDB table with the given configuration.
resources:
  Resources:
    ContactFormDynamoDbTable:
      Type: 'AWS::DynamoDB::Table'
      DeletionPolicy: Retain
      Properties:
        AttributeDefinitions:
          -
            AttributeName: id
            AttributeType: S
        KeySchema:
          -
            AttributeName: id
            KeyType: HASH
        ProvisionedThroughput:
          ReadCapacityUnits: 1
          WriteCapacityUnits: 1
        TableName: ${self:provider.environment.DYNAMODB_TABLE}
3. Peek into the Serverless functions
The demo application is written in python, it uses boto3 AWS SDK to send emails using SES and for performing read/write operations on DynamoDB.
The sendMail function is triggered when a POST request is received from the contact form on the /sendMail path. The list function is triggered by a GET request to /list path defined in the serverless.yml file.
Building the Application
Now that you have set up and configured the Serverless Framework in your machine, it’s time to get things rolling.
1. Clone the application
Let’s start by cloning the application from Github.
$ git clone https://github.com/faizanbashir/python-ses-dynamodb-contactform
$ cd python-ses-dynamodb-contactform
2. Verify e-mail address with SES
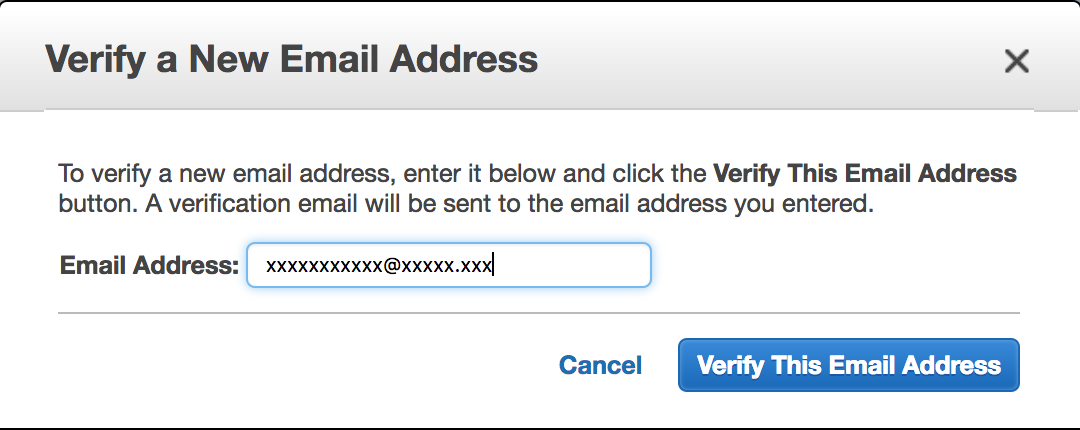
Fast-forward to verifying the email you intend to send email from SES. All you need to do is add an email address, AWS will send you a verification with a link to verify the email address.
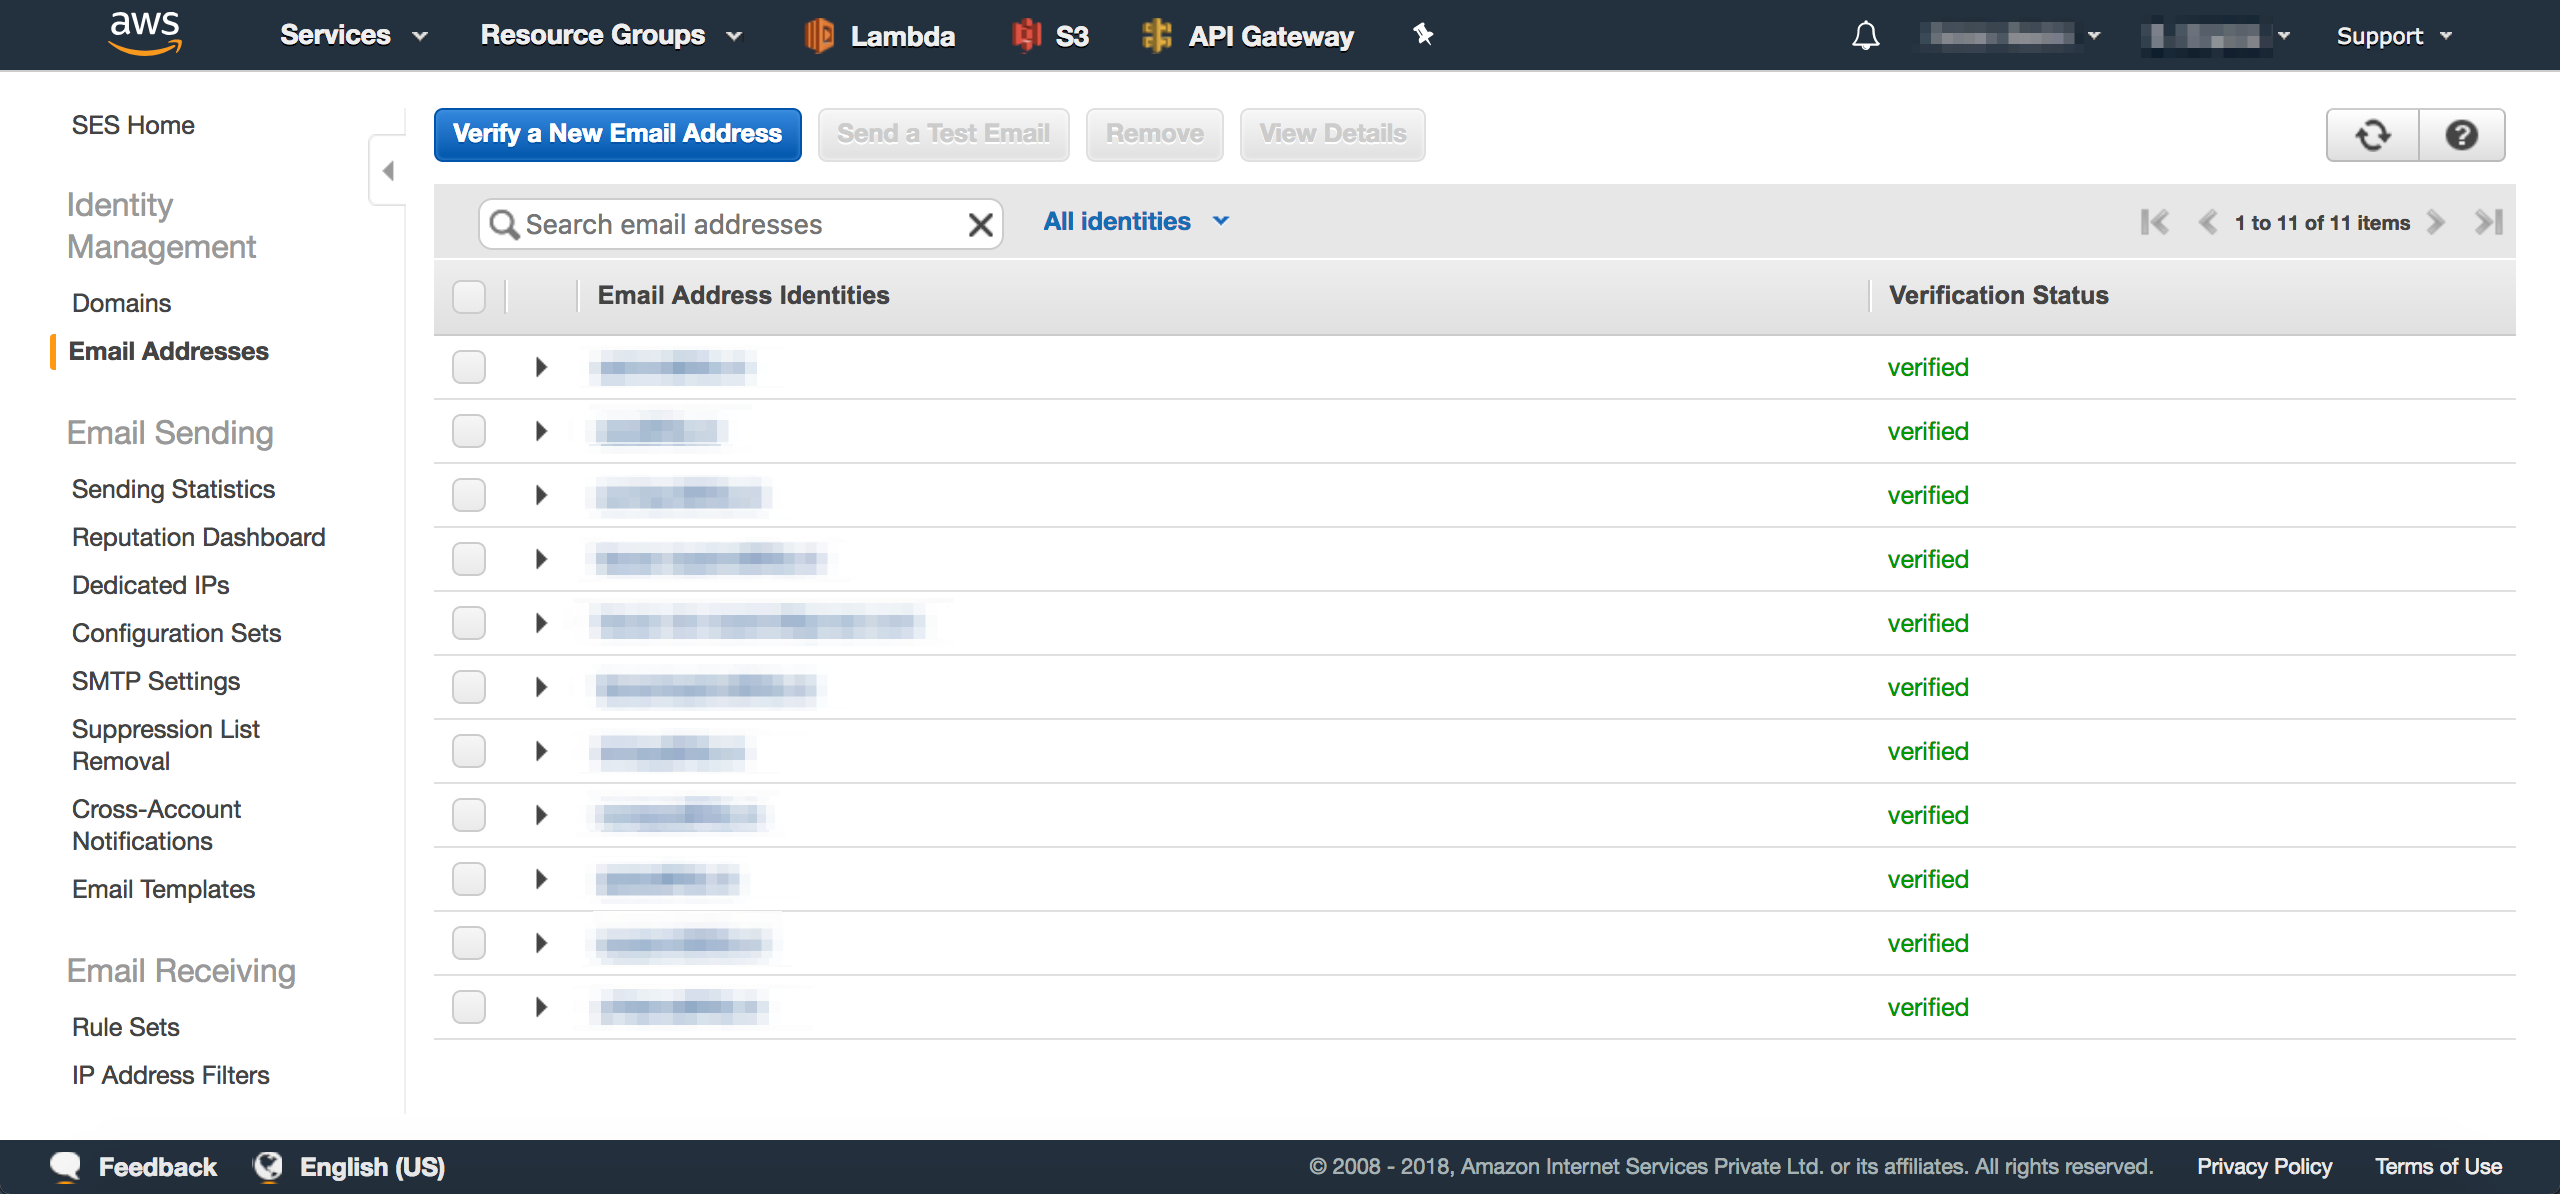
After verifying the email address, the “Verification Status” for the email will show up as “verified”.
3. Configuring the application
You need to configure the serverless.yml with your account specific details to make it work. Replace the region, profile and SENDER_EMAIL properties in serverless.yml as seen here:
provider:
  name: aws
  runtime: python2.7
  region: <aws-region>
  profile: <aws-user>
  ...
environment:
  SENDER_EMAIL: <verified-email-address>
Awesome! with the configuration done you can turn your attention to deploying the application.
4. Deploying to AWS
Everything in place now you can deploy application with a single command, ain’t that super cool.
$ sls deploy -vIt will take a minute or two to execute if you religiously followed this tutorial, at the end it will provide you a list of endpoints to use for calling our functions. It will look something like this:
endpoints:
POST - https://xxx.execute-api.xx.amazonaws.com/development/sendMail
GET - https://xxxx.execute-api.xx.amazonaws.com/development/list
5. Testing the endpoints
Now that we have the endpoints let’s test application to see if it’s working or not. The /sendMail endpoint expects input in JSON format.
$ curl --header "Content-Type: application/json" \
--request POST \
--data '{"firstname": "John", "lastname": "Doe", "email": "[email protected]", "message": "Hi there"}'\
https://xxx.execute-api.xx.amazonaws.com/development/sendMail
If the email is sent and the entry written to DynamoDB the request will exit with a response like this.
> "Email Sent!"Now, let’s test the /list endpoint in the same manner with the GET endpoint you got after deploying the application.
$ curl https://xxxx.execute-api.xx.amazonaws.com/development/listThe /list endpoint response will look something like this:
> {"body": [{"firstname": "John", "lastname": "Doe", "email": "[email protected]", "updatedAt": 1529425349731, "message": "Hi there", "id": "f651c404-73dc-11e8-bf3e-be54be0b5d22", "createdAt": 1529425349731}], "statusCode": 200}6. The Contact Form
With the Serverless functions working properly we can go ahead and integrate it into our static contact form. The static form code is in the public folder.
Open the index.html file in your favourite IDE and update the URL variable with the /sendMail endpoint and you are good to go.
//Insert your lambda function URL here

var URL = "https://xxx.execute-api.xx.amazonaws.com/development/sendMail";
Navigate to the page using the file:///<path>/<to>/<folder>/index.html in the browser or upload it to S3 bucket and enable static hosting.
$ aws s3 sync public s3://your-bucket-name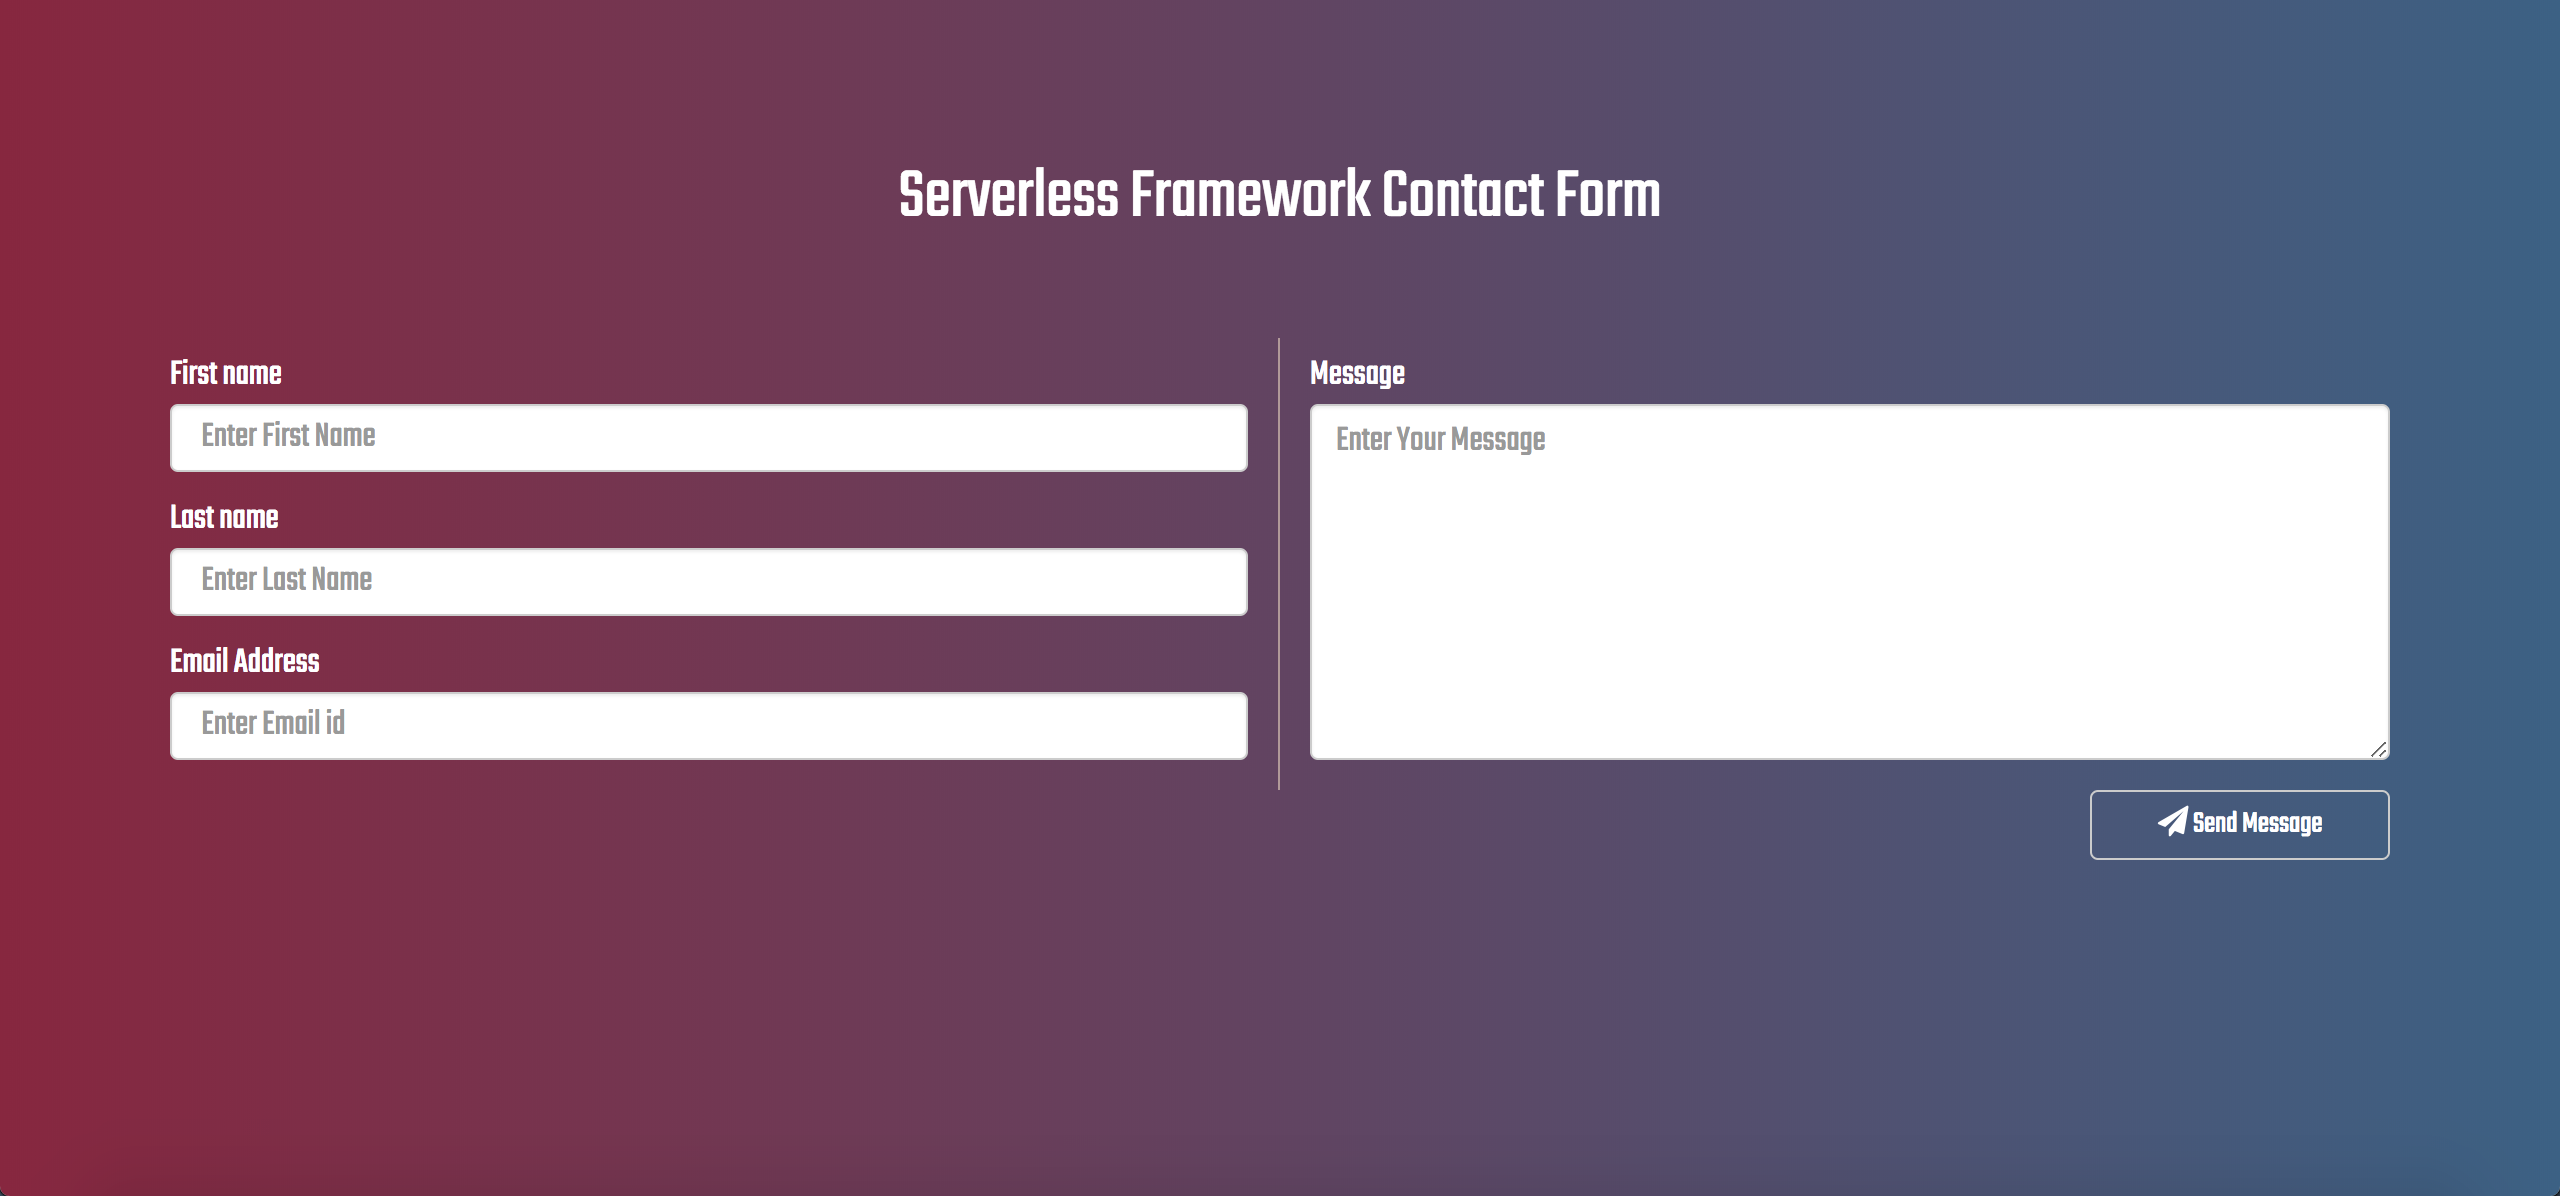
Treat yourself with a Cappuccino, Latte or
Afterthoughts
Serverless is definitely the way forward, not just for the worlds static contact forms. Serverless has opened a universe of opportunities for you, the contact form was just to get started with. How about using Serverless for your website analytics, a visitor counter or maybe click tracking? Endless opportunities are waiting for you. Get started for your next project in Serverless, it’ll be an awesome journey.
Dive Deeper: Recommended Reads
Discover the world of serverless architecture in our comprehensive collection of articles! Equip yourself with valuable knowledge and skills in the exciting realm of serverless computing by exploring the following topics:
- What is serverless architecture and what are its pros and cons: Understand the ins and outs of serverless architecture, its advantages, and its drawbacks.
- Serverless Technology: Exploring Cloud Providers, Benefits, Challenges, and Kubernetes Integration: Dive deeper into the serverless landscape and grasp the fundamentals of how it operates.
- Building Serverless Knative function to detect weather using OpenWeatherMap and Python: Explore a practical example of creating a serverless function with Knative, OpenWeatherMap API, and Python.
- Building Serverless OpenFaaS function to detect weather using OpenWeatherMap and Python: Discover another approach to building a serverless function using OpenFaaS, OpenWeatherMap API, and Python.
Don’t just stop there; continue your journey and delve even further into the fascinating and expansive world of serverless technologies and their endless possibilities.
Originally published at www.serverlessops.io.
Subscribe to Faizan Bashir
Get the latest posts delivered right to your inbox

